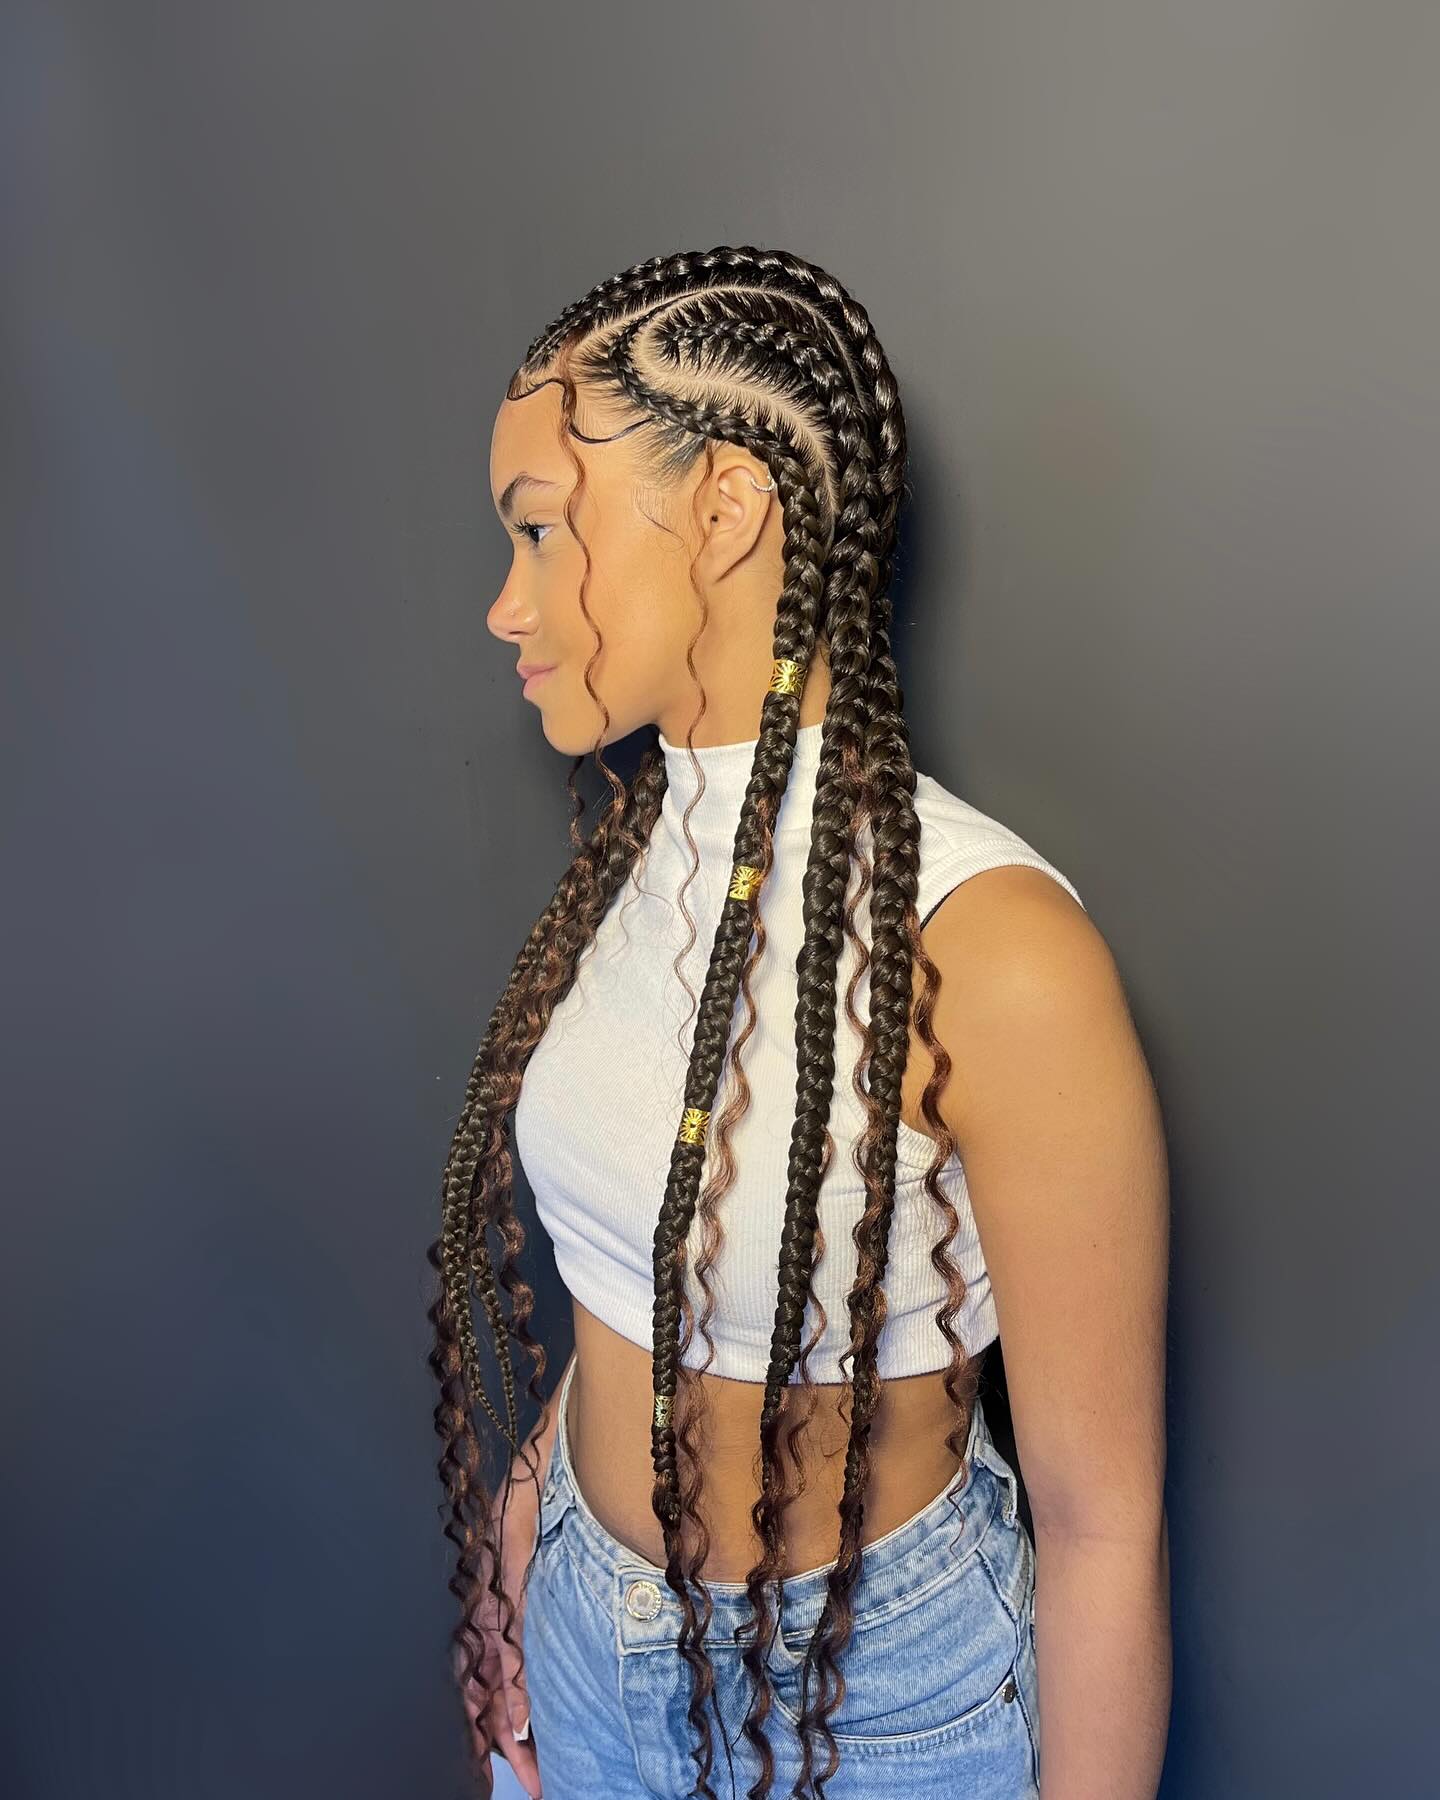
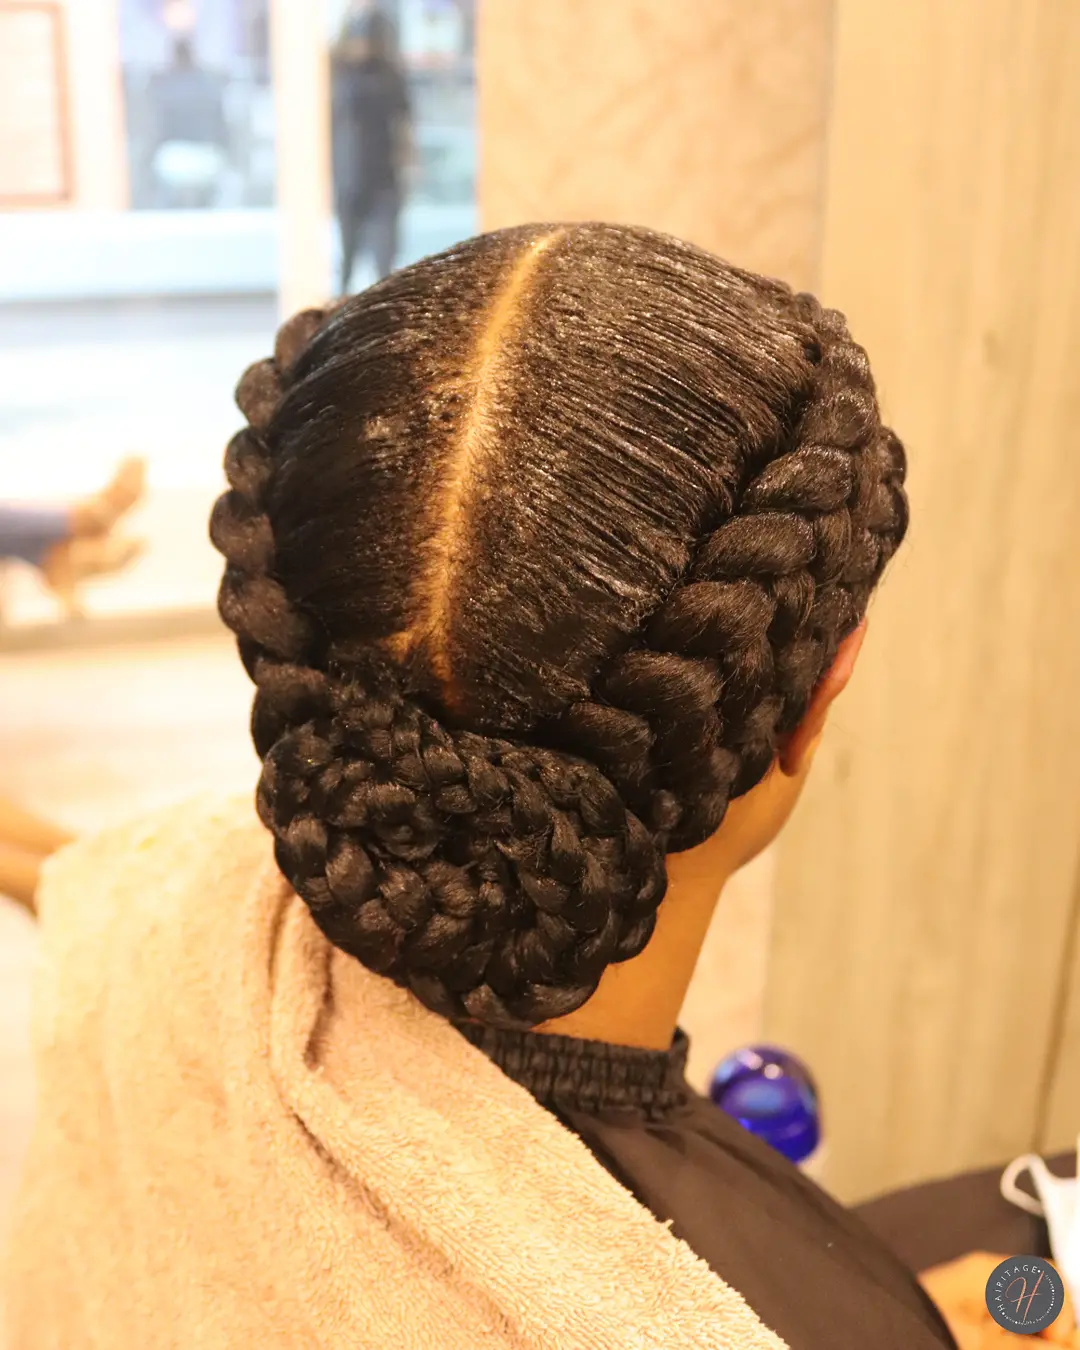
Fulani Braids
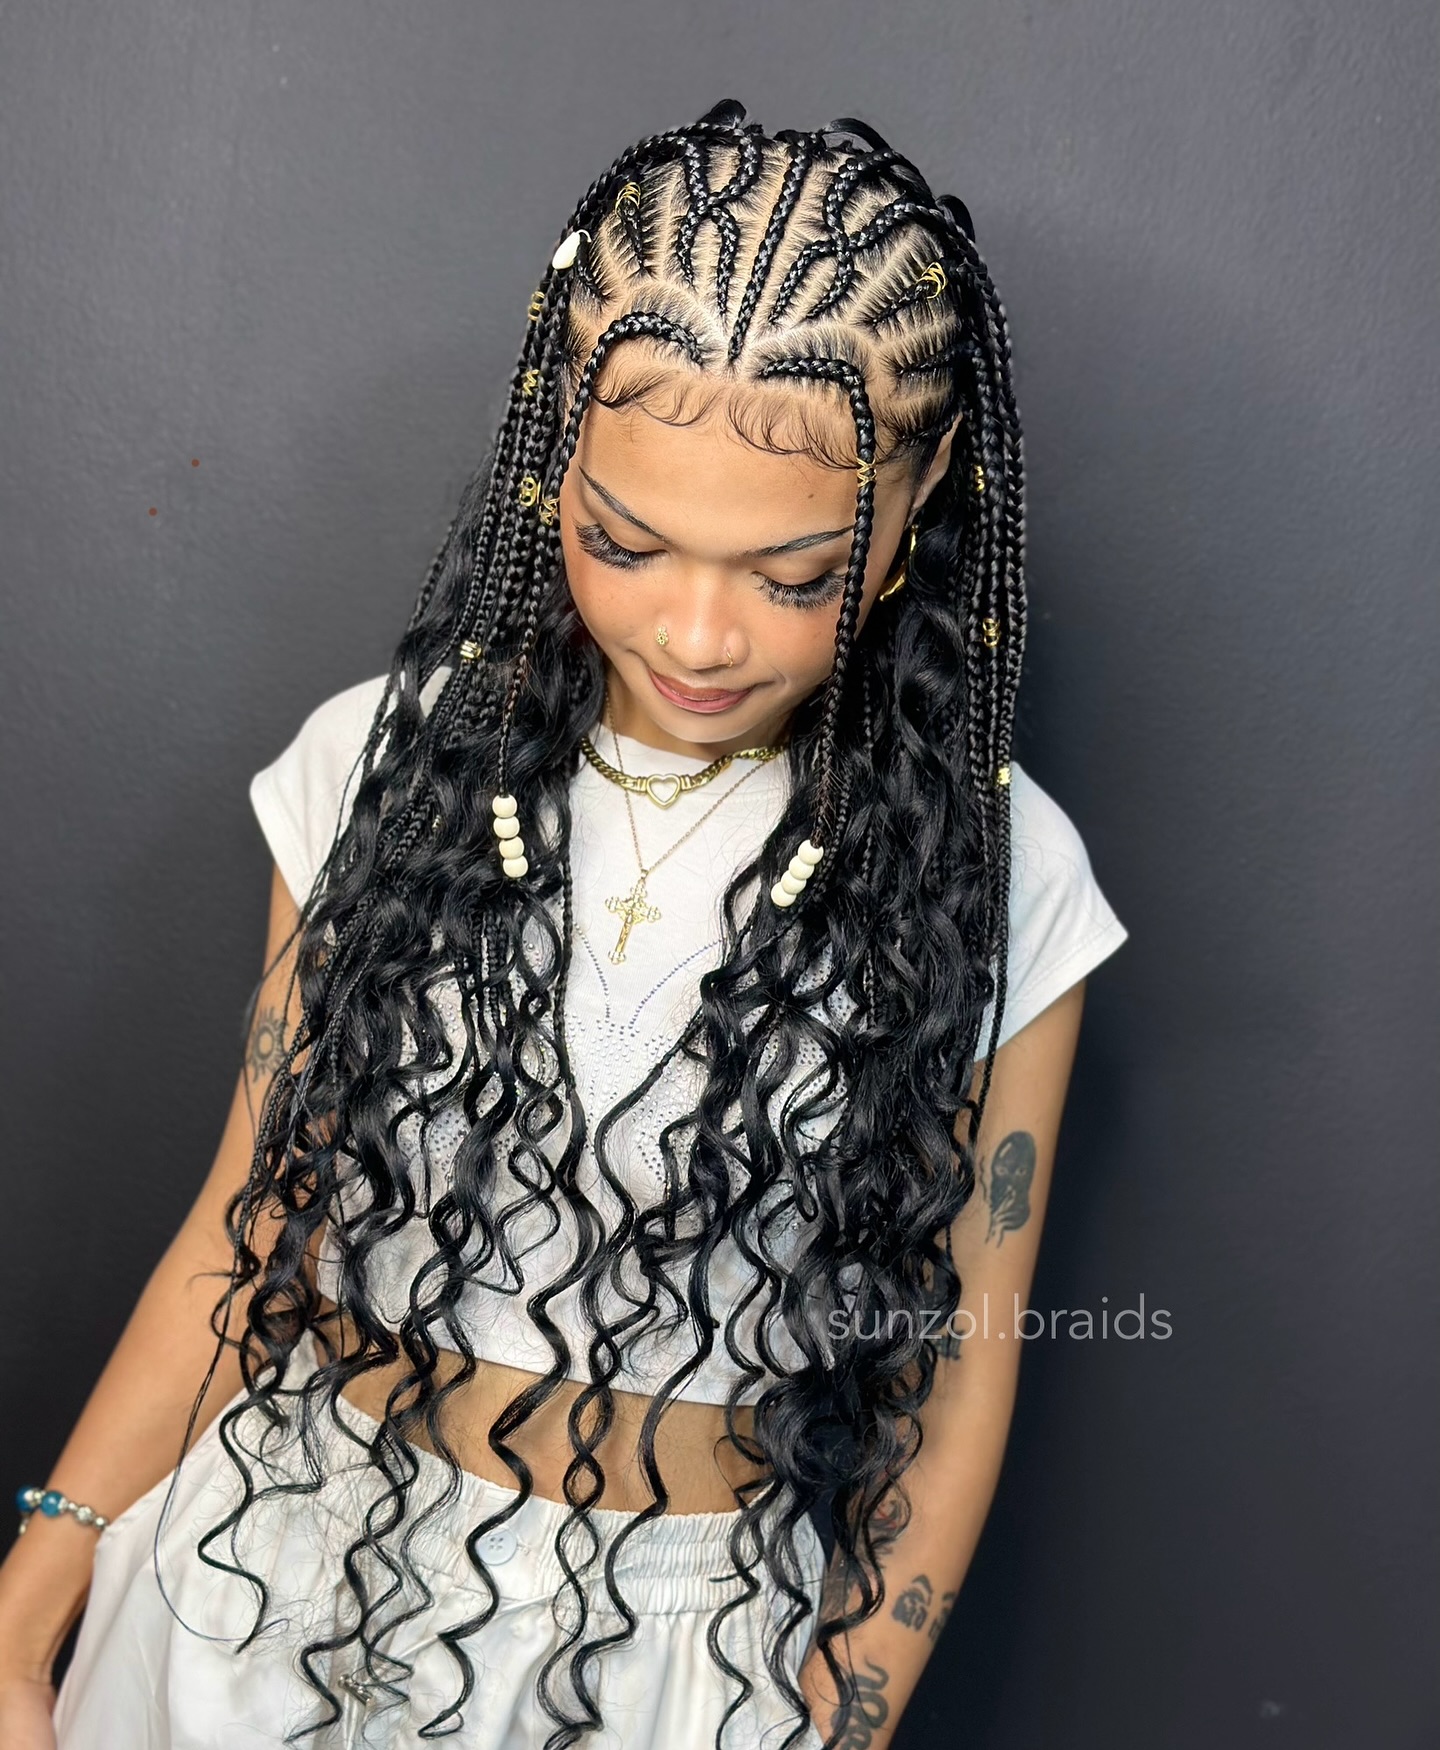
Fulani braids blend different braiding techniques together beautifully.
You get cornrows in the front of your head first. The back features box braids instead of more cornrows. A signature middle braid runs down the center of your scalp.
Decorative beads and accessories complete this traditional West African look. Don’t be afraid to add many beads and charms. There is no such thing as too many decorations with Fulani braids.
This style honors rich cultural traditions from the Fulani people. It looks striking and unique compared to other braid types.
Lemonade Braids
Lemonade braids owe their modern fame to Beyoncé’s iconic album.
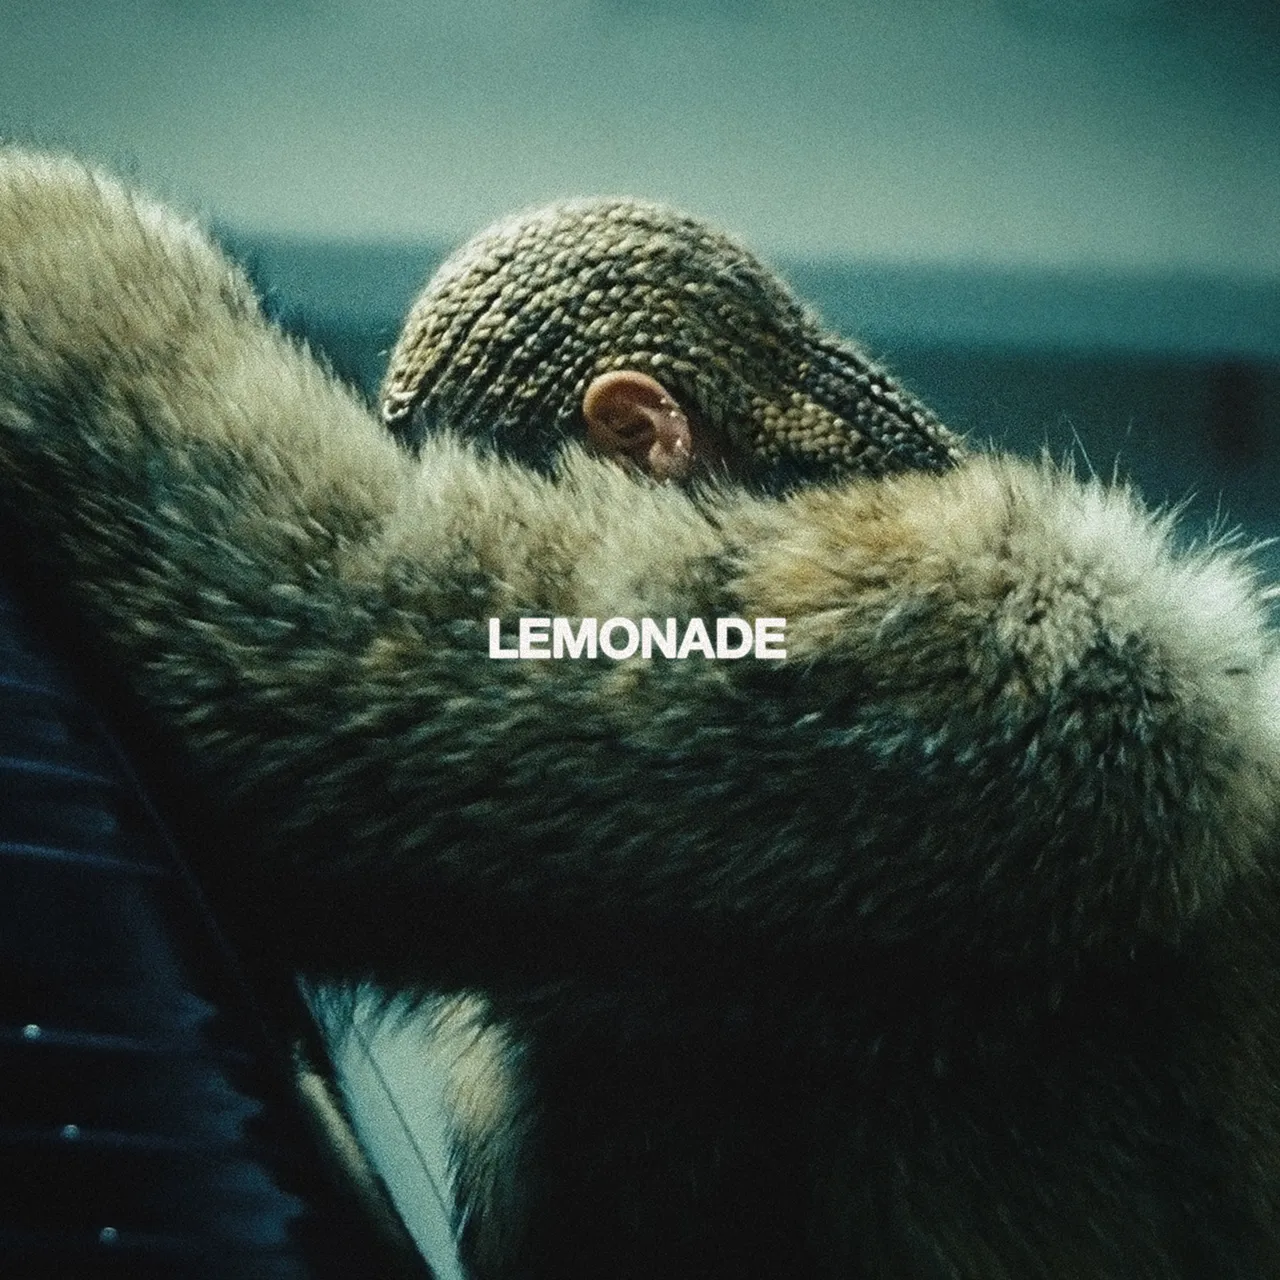
These are cornrows with a deep dramatic side part. The braids sweep to one side of your head entirely.
This trendy style takes confidence and attitude to pull off. It works best for those wanting a bold, fashionable statement.
The deep side part sets these braids apart from regular cornrows. You can wear them long or short depending on your preference.
Lemonade braids frame your face beautifully on one side. They remain popular years after Beyoncé made them famous.
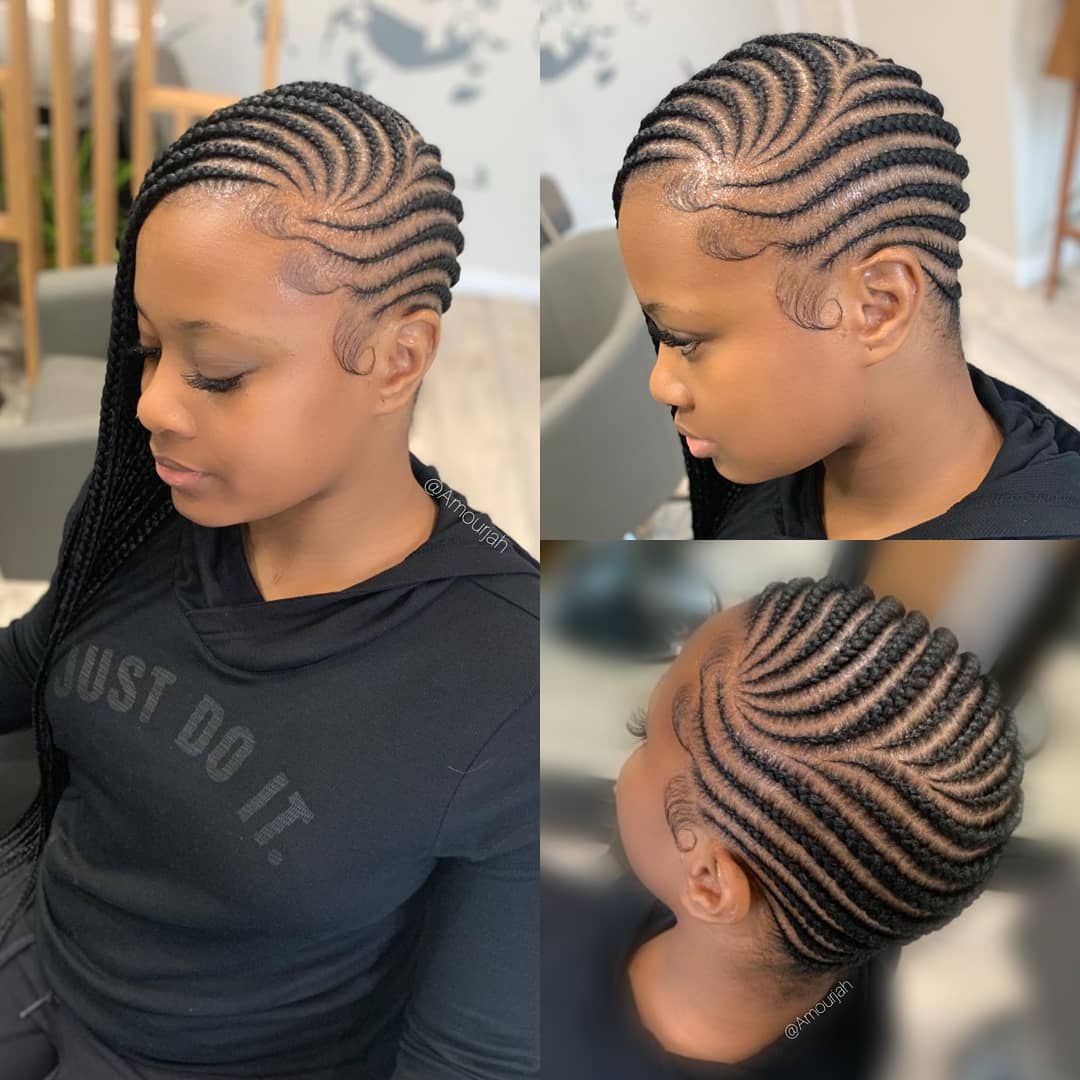
Stitch Braids
Stitch braids offer a distinctive, patterned variation of cornrows.
A specialized braiding technique creates a “stitched” appearance throughout. The braids look like small, even stitches sewn into your scalp.
This style requires a skilled braider for best results. The pattern stands out more than regular cornrows do. Stitch braids look especially striking when done with clean parts. You can wear them in straight rows or creative designs.
This style holds up well for several weeks. It offers a fresh take on traditional cornrow patterns.
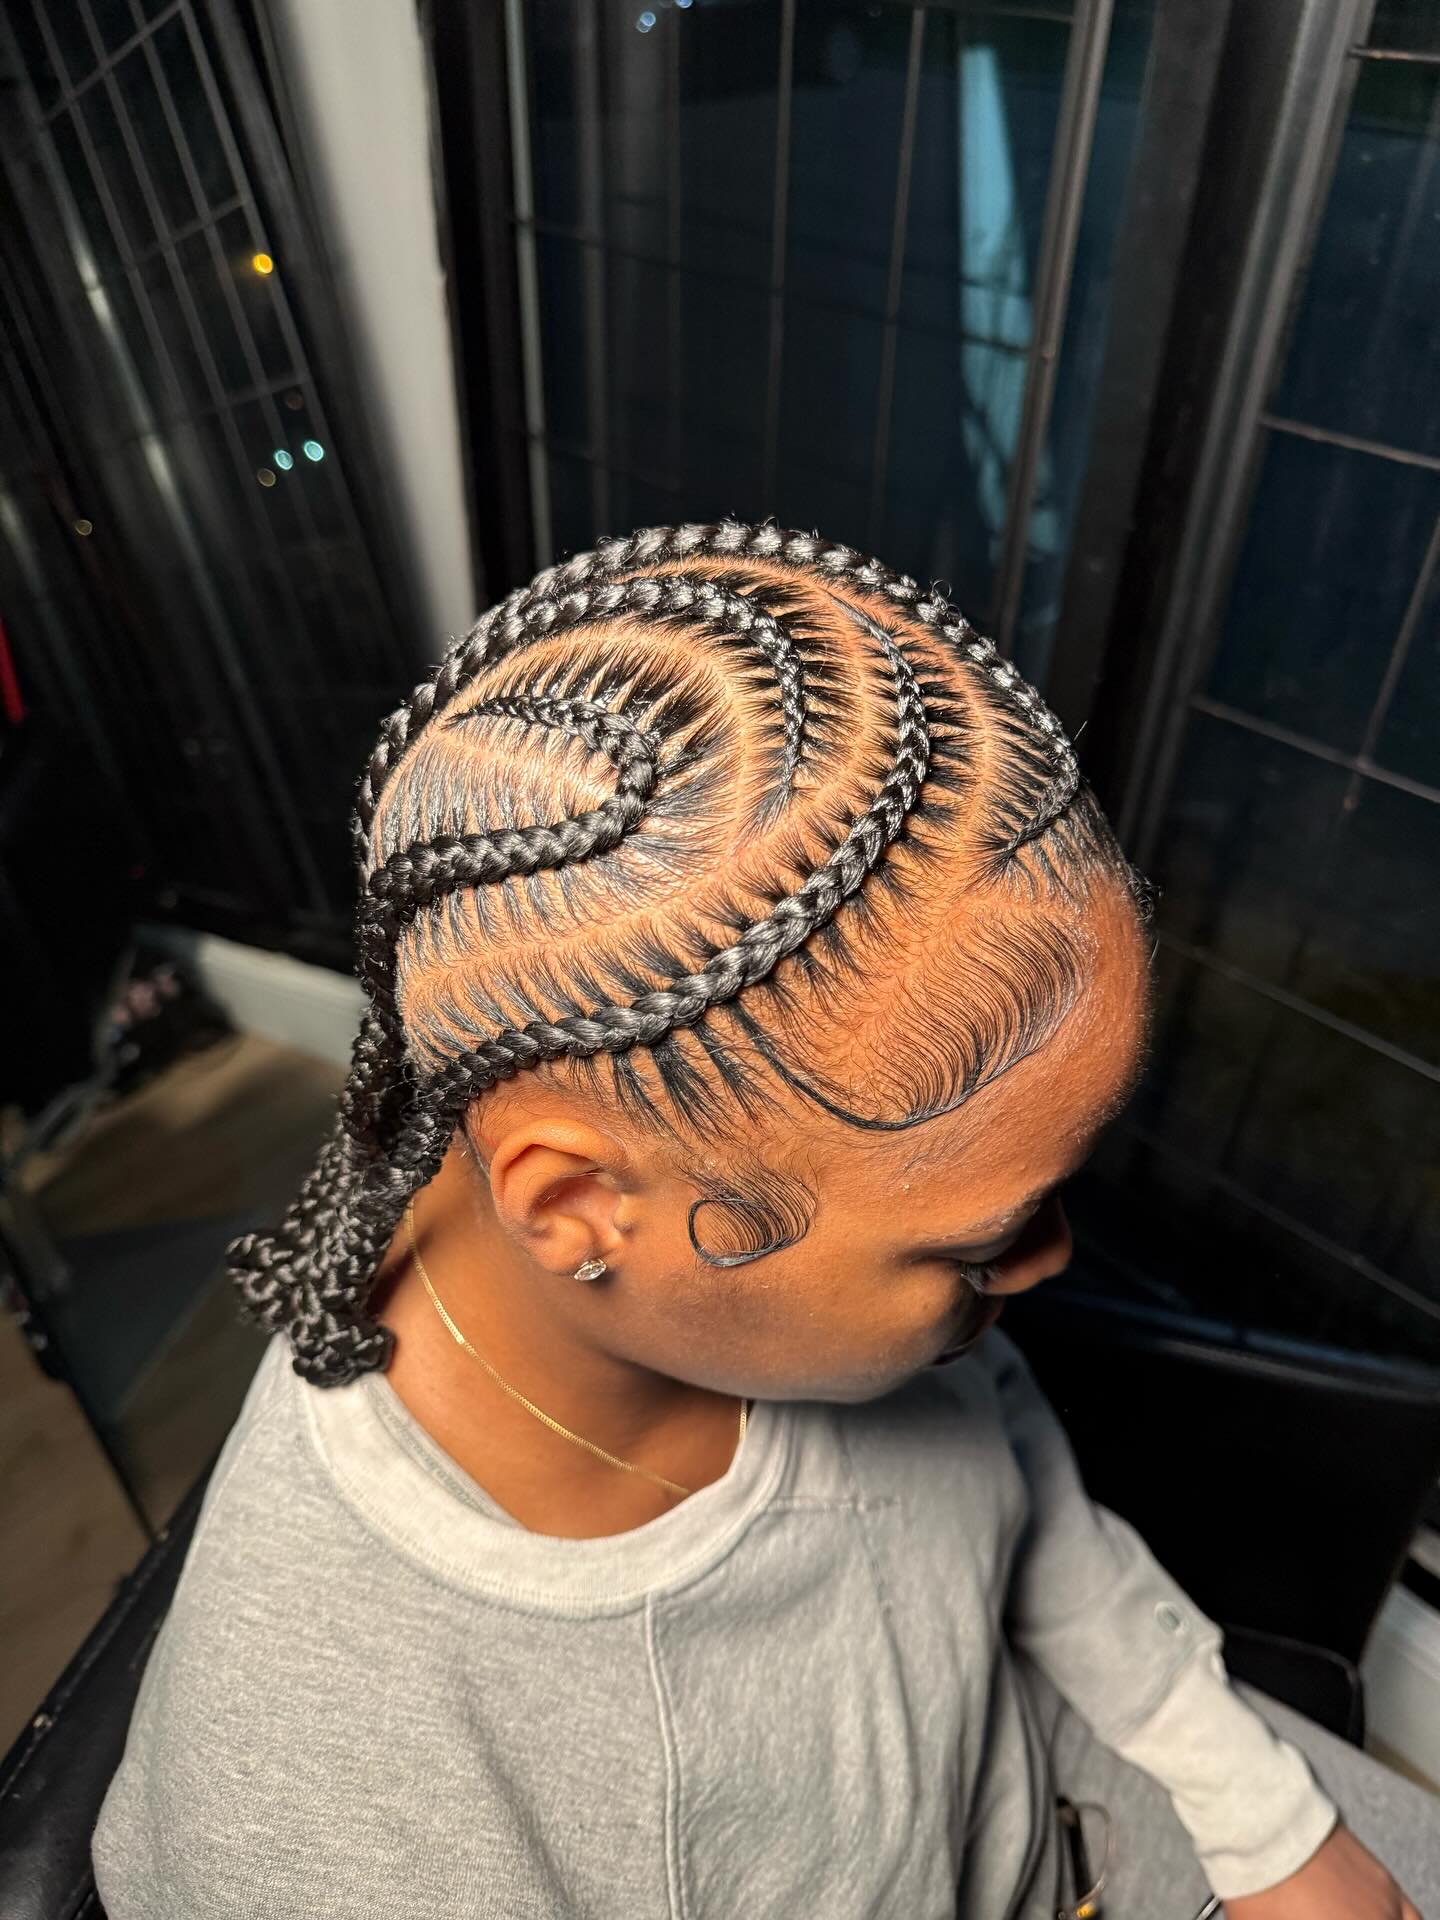
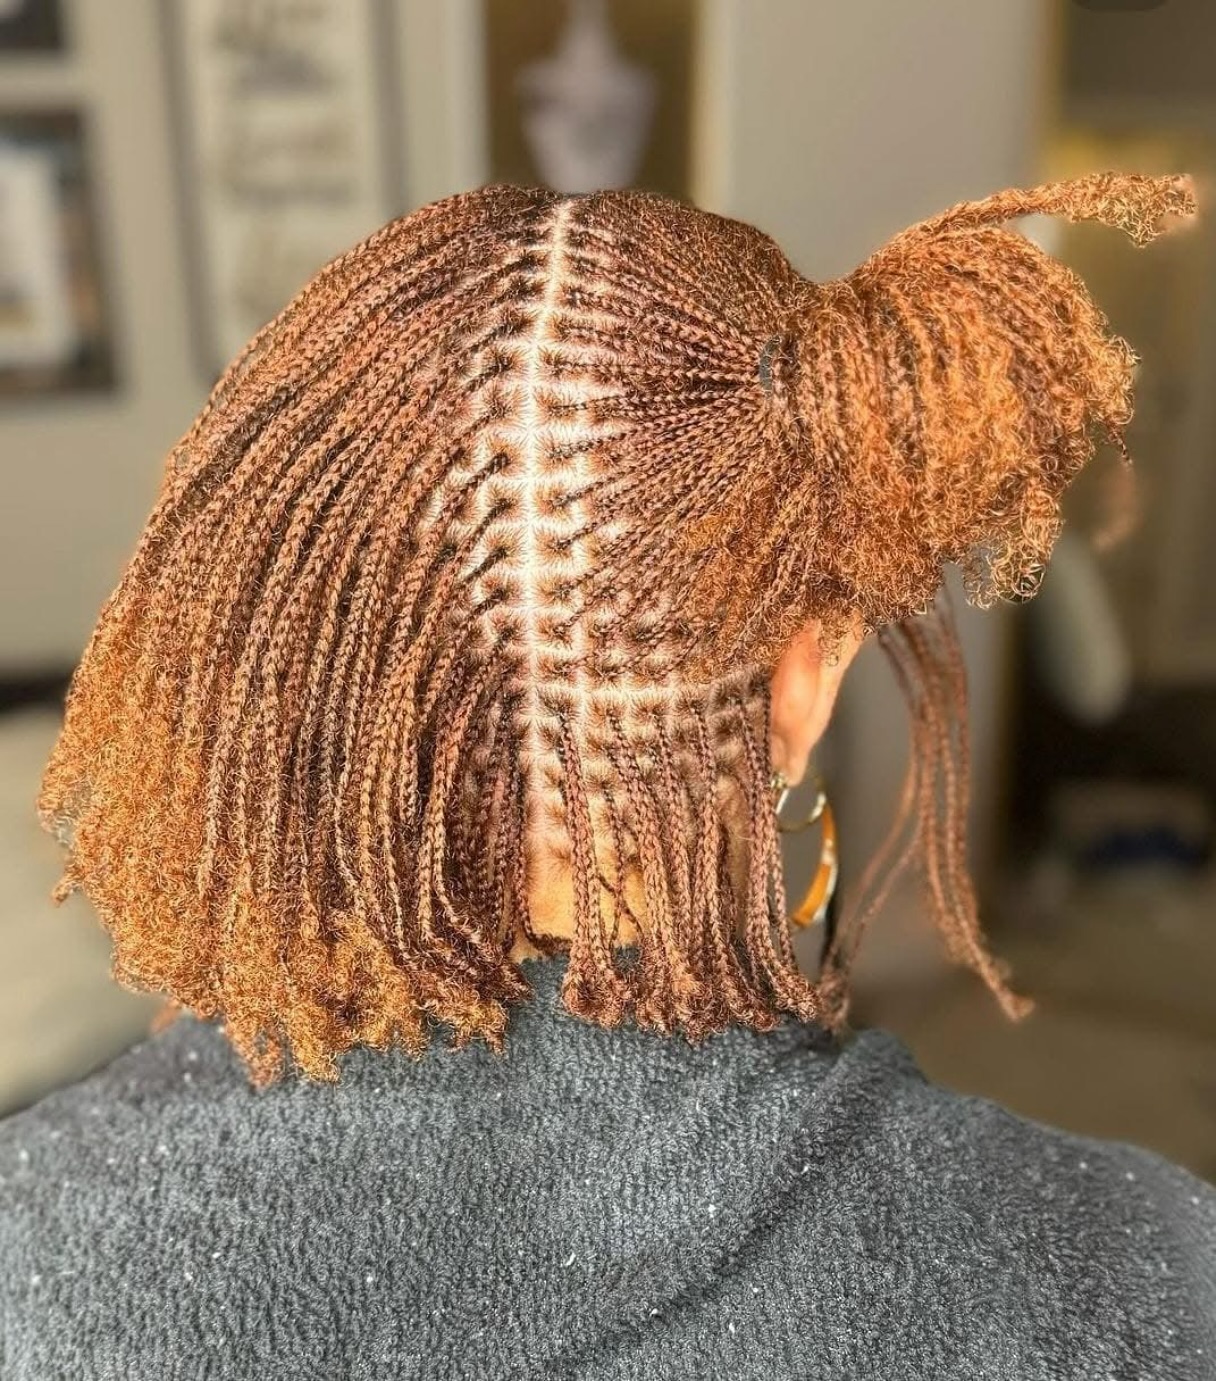
Ghana Braids
Ghana braids add thickness and volume to traditional cornrow styles.
Start by forming cornrows close to your scalp first. Then gradually add extension hair as you continue braiding. This technique creates braids that get thicker toward the ends. The result looks fuller and more dramatic than regular cornrows.
Ghana braids can be straight or curved into intricate patterns. They protect your natural hair while adding significant length.
You can accessorize them with cuffs or beads. This style turns heads and starts conversations wherever you go.
Micro Braids
Micro braids offer a delicate, intricate finish for patient people.
Each braid is about the width of a pencil lead. They can take many hours or even days to install fully. The results look like fine strands of textured natural hair.
You can wear them straight, curled, or woven into larger styles.
Micro braids are easier to manage than other small braids. They tangle less and stay neat for longer periods. But they do put more tension on your hair than larger braids.
Always give your hair a break between micro braid installations.
Crochet Braids
Crochet braids use a latch hook for fast installation.
First, braid your natural hair into cornrows as a base. Then attach pre-braided hair extensions using the latch hook.
This versatile method allows for many different finished looks. You can achieve braids, twists, locs, or curly styles easily.
Crochet braids take much less time than individual braiding. You can finish a full head in just a few hours.
The style is lightweight and puts less stress on your scalp. Switching up your look becomes quick and affordable with crochet braids.
Stylish Variations for Special Occasions
Halo Braid

Halo braids wrap around your crown like a beautiful circle of hair.
Use the Dutch braiding technique to create this ethereal style. Wrap the finished braid around the top of your head carefully. Secure it in place with bobby pins along the way.
The result looks romantic, angelic, and perfect for weddings. You can create a full halo using all your hair. Or make a half-halo that leaves some length flowing down.
This style stays secure all day and night. It looks complicated but becomes easy with practice.
Crown Braid
Crown braids differ from halo braids in one key way. They use the French braiding technique instead of Dutch.
Start at the nape of your neck and braid upward around your head. Work your way completely around until you reach the start.
Long hair allows you to cheat this style easily. Part your hair into two even sections first. Create two traditional three-strand braids with those sections.
Wrap each braid around your head from opposite sides. Tuck the ends under and secure with bobby pins throughout.
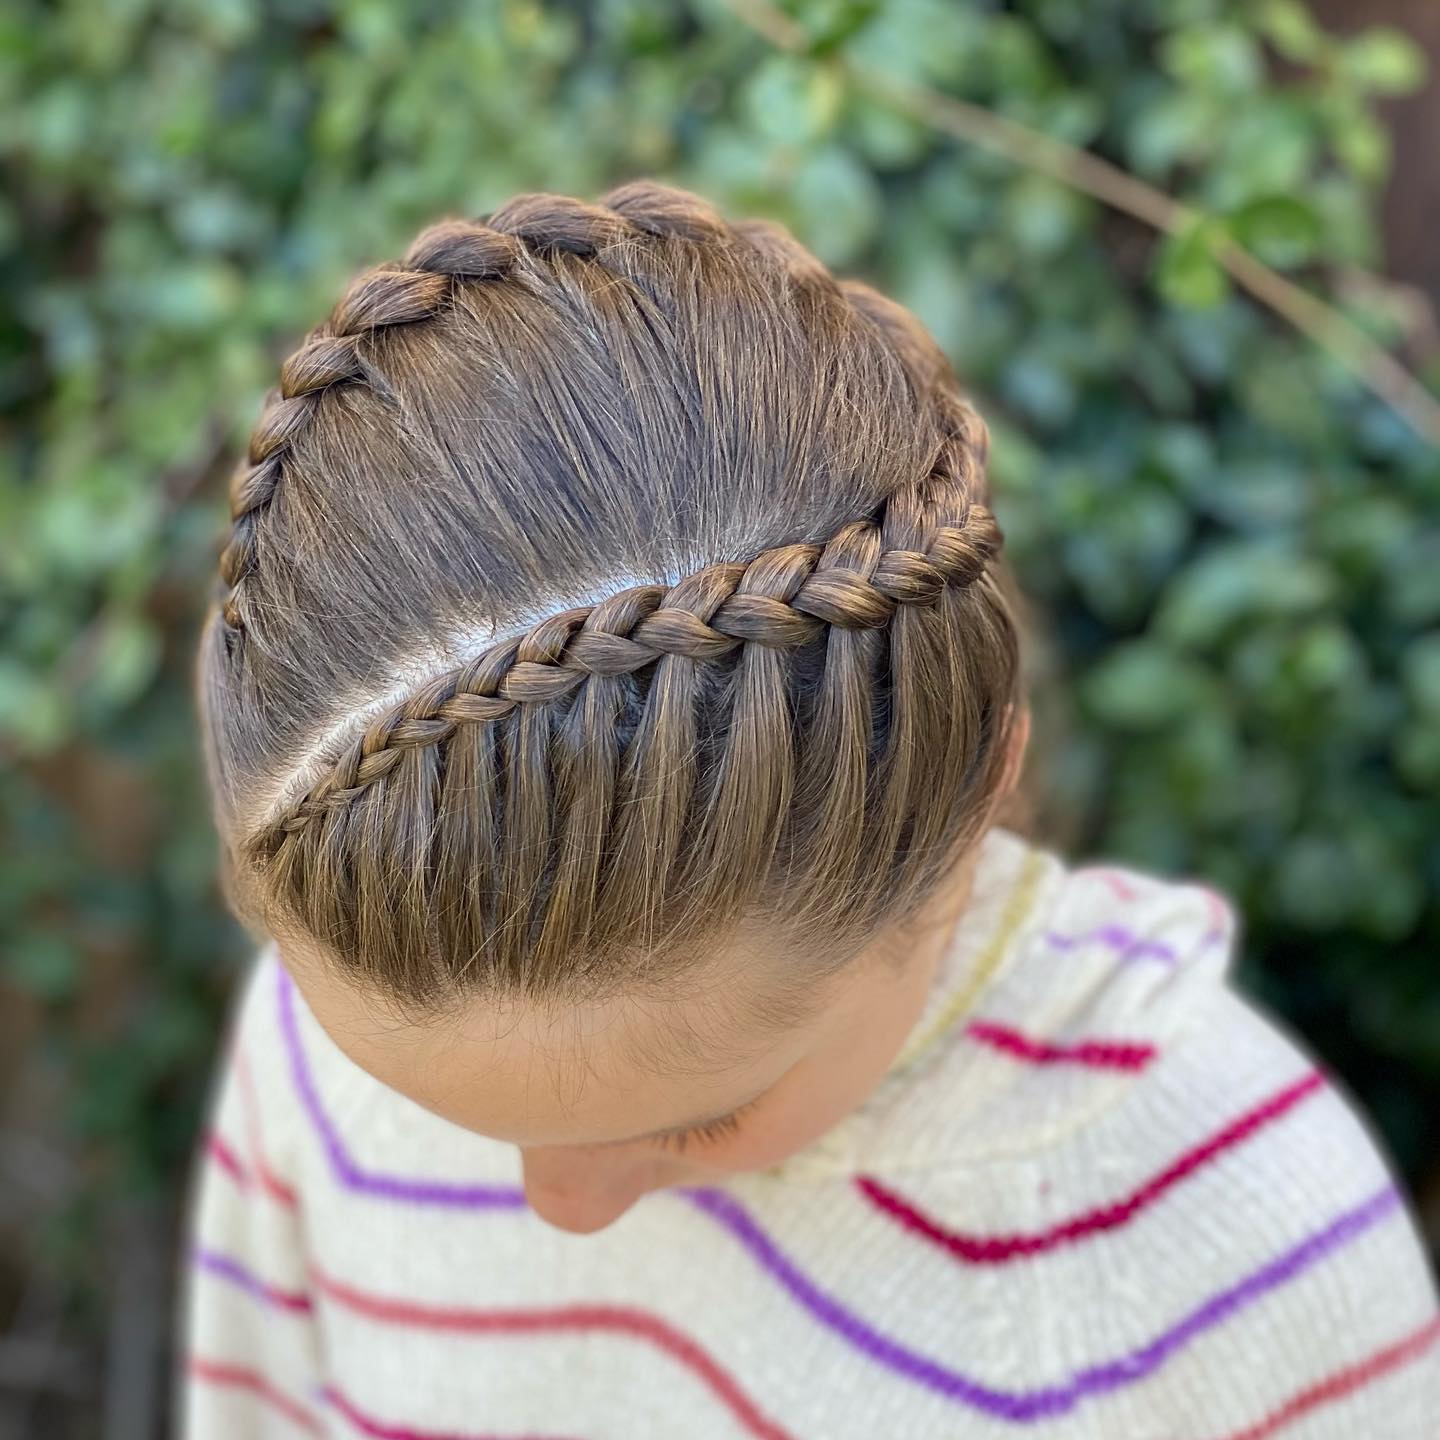
Milkmaid Braids
Milkmaid braids give you a vintage-inspired style with European roots.
Split your hair down the middle into two equal sections first. Braid each section into a basic three-strand braid securely. Lift each braid up and over the top of your head gently.
Tuck the ends under the opposite braid to hide them. Secure everything in place with sturdy bobby pins. This creates a charming braided crown across your forehead. The style stays secure without pulling or tugging.
Milkmaid braids look fresh and romantic for garden parties or festivals.
Lace Braid
The lace braid creates a delicate, cascading effect along your hairline.
This technique involves adding hair from only one side. Start by sectioning off hair where you want the braid. Do a French braid but add hair from just one side.
Only add the hair closest to your face as you braid. This makes the braid appear to cascade down your hair. The other side remains loose and flowing freely. Lace braids work great for half-up, half-down styles.
They frame your face beautifully without pulling all your hair back.
Ladder Braid
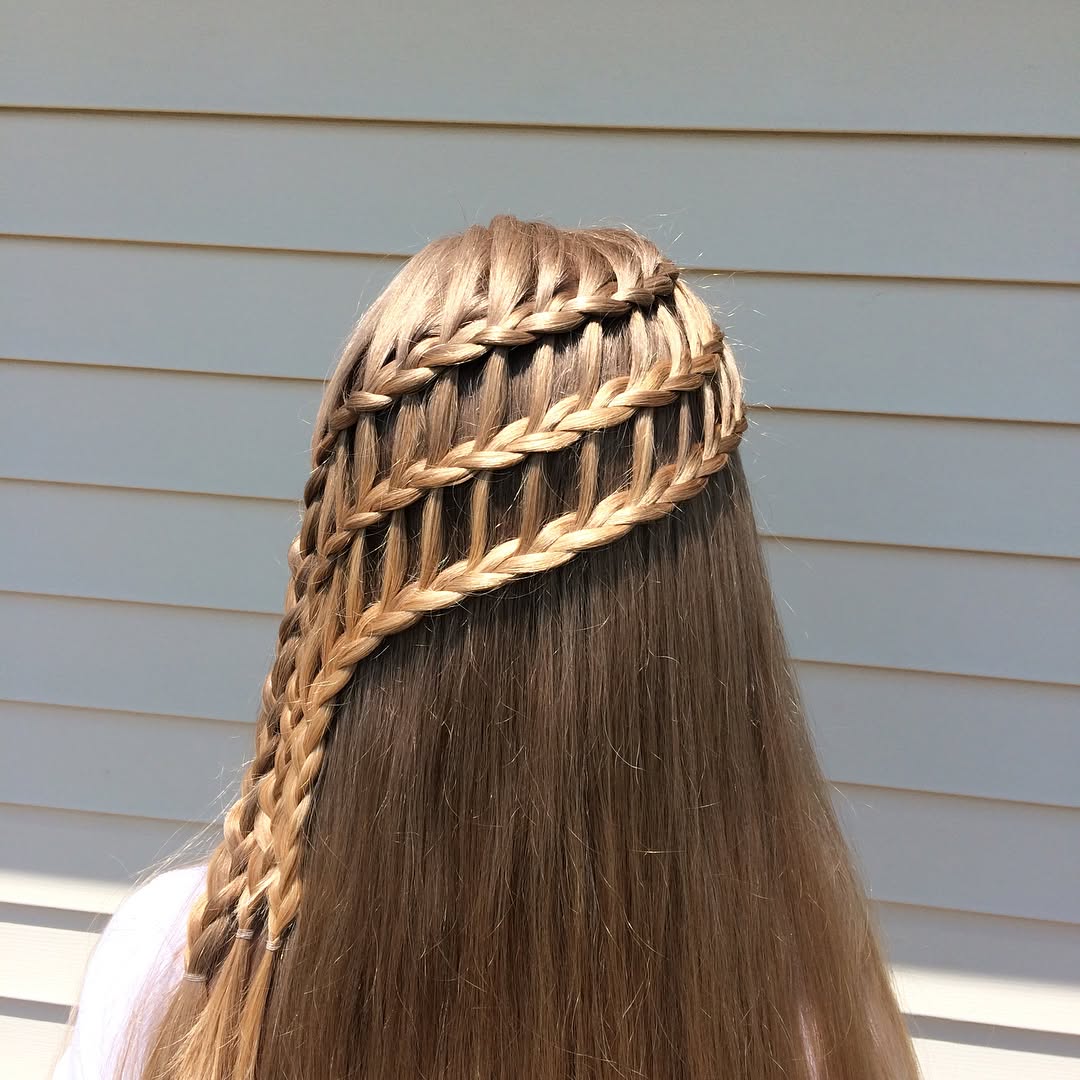
The ladder braid combines a waterfall braid with a second parallel braid.
Start with a waterfall braid along the side of your head first. Leave some hair strands out while braiding as usual. These dropped pieces become the “rungs” of your ladder.
After finishing the waterfall braid, start a second braid parallel to it. Incorporate the dropped pieces from the first braid into the second. This creates a connected, ladder-like appearance between both braids.
The result looks intricate and impressive to everyone who sees it. This style works best on medium to long hair lengths.
Infinity Braid
The infinity braid results in a pattern resembling the infinity symbol.
This braiding style is more complex than basic techniques. Start by dividing your hair into three equal sections first. Take the middle section and divide it in half again.
These two strands will serve as the center of your infinity symbol. Weave the outer strands around the center in a figure-eight pattern.
Take additional hair from each side as you go along. Once you reach the end, secure with a hair tie. The captivating result is well worth the extra effort required.
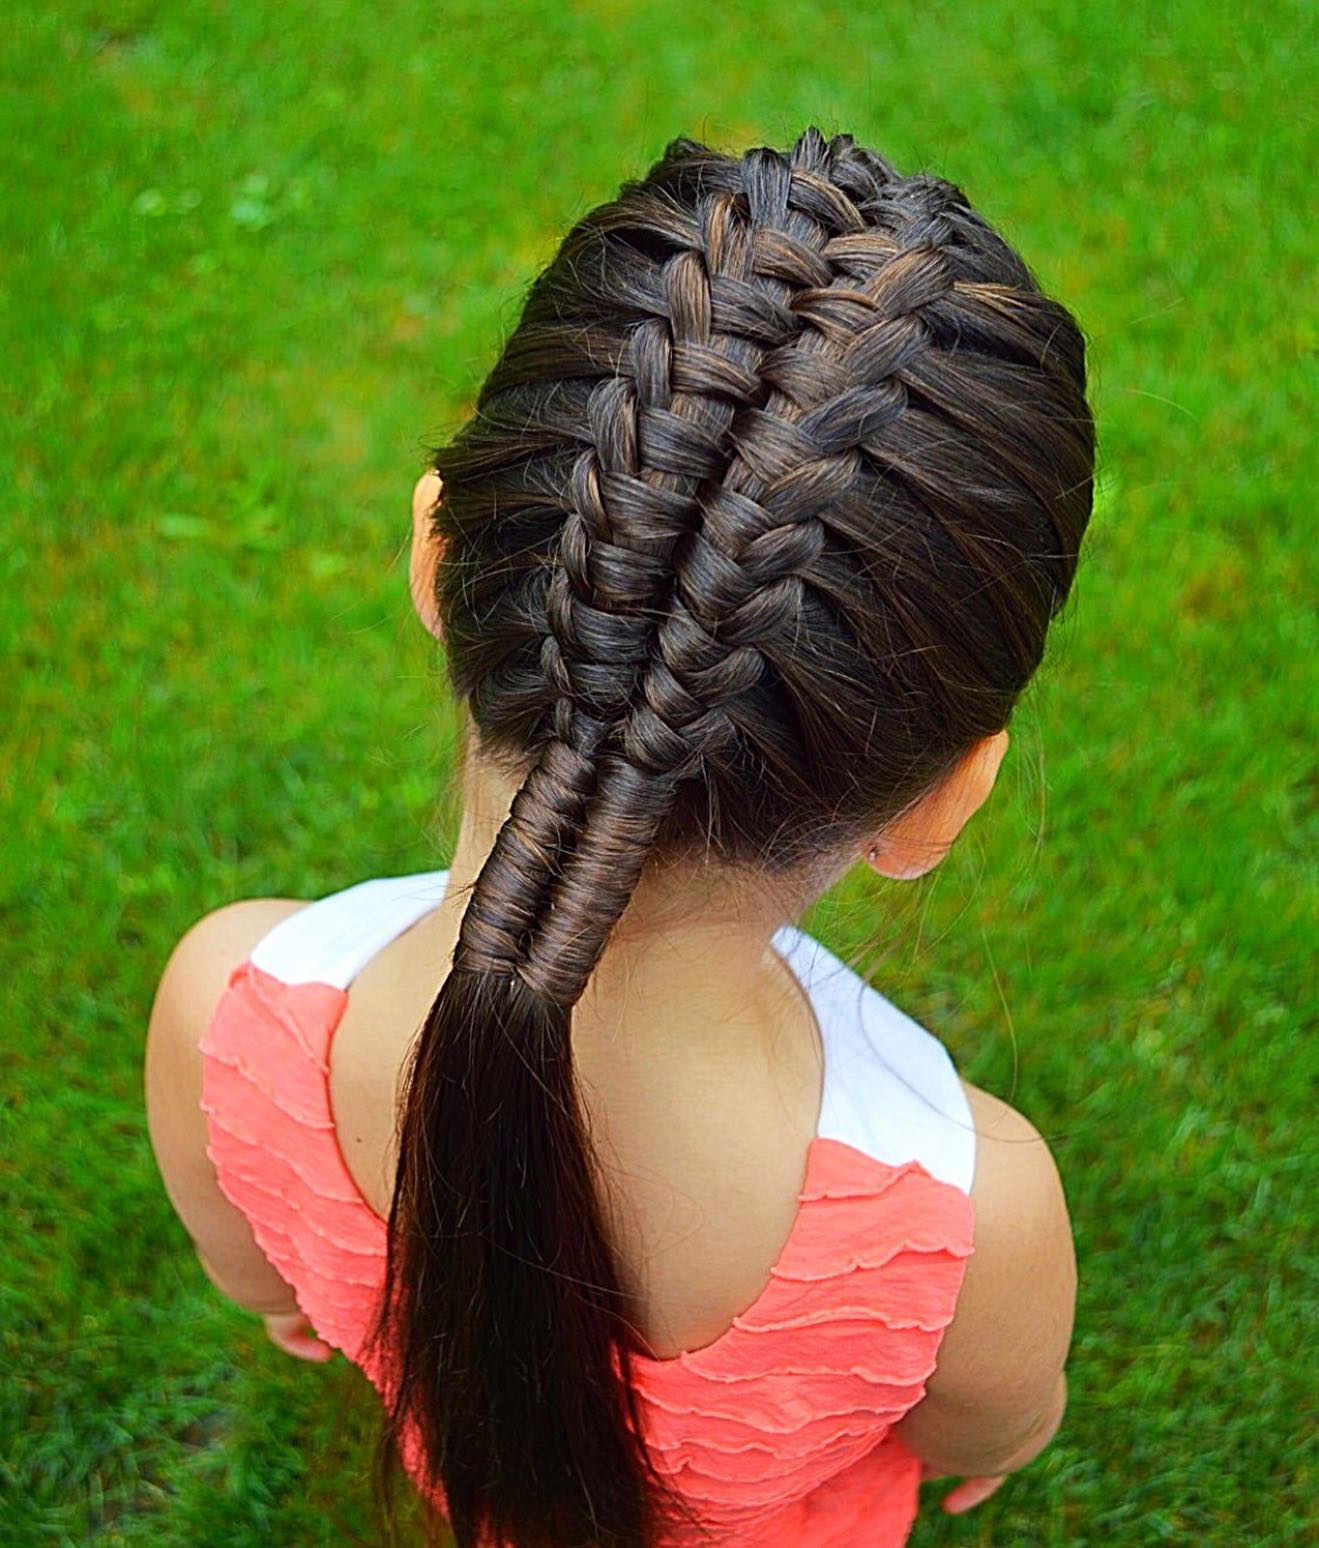
Four-Strand Braid
The four-strand braid offers a thicker, more intricate look than three strands.
Separate your hair into four equal sections to begin. Starting from the left, take the first strand. Weave it under the second strand, then over the third.
